
Finding the right tools for your development workflow is a constant struggle, and Git tooling is no exception. Despite the plethora of Git clients available, none of them ever felt quite right. For a while, I settled on GitFiend. It worked well enough, but my workflow was still not quite right: I’d use the GUI for visual tasks, then constantly drop back into the terminal whenever I hit a complex edge case.
I experimented with the usual suspects—GitKraken, GitHub Desktop, and Git GUI—but they all shared the same flaws. They were either unintuitive, overly reliant on mouse navigation, forced constant context-switching (alt-tabbing) away from my terminal, or inevitably became sluggish as repositories grew.
When I first came across Lazygit, I didn’t expect it to change thing. But it turned out to be the perfect middle ground. It’s a Terminal UI (TUI) that delivers the rich visual feedback of a GUI, paired with the speed and keyboard-centric efficiency of the CLI. It solved my Git dilemma completely—and yes, if you still prefer the mouse, it supports that too.
The “Killer Features”
LazyGit doesn’t just provide eye-candy and keyboard speed; for power users, it provides game changing workflow that other tools fail to provide.
Interactive Rebase
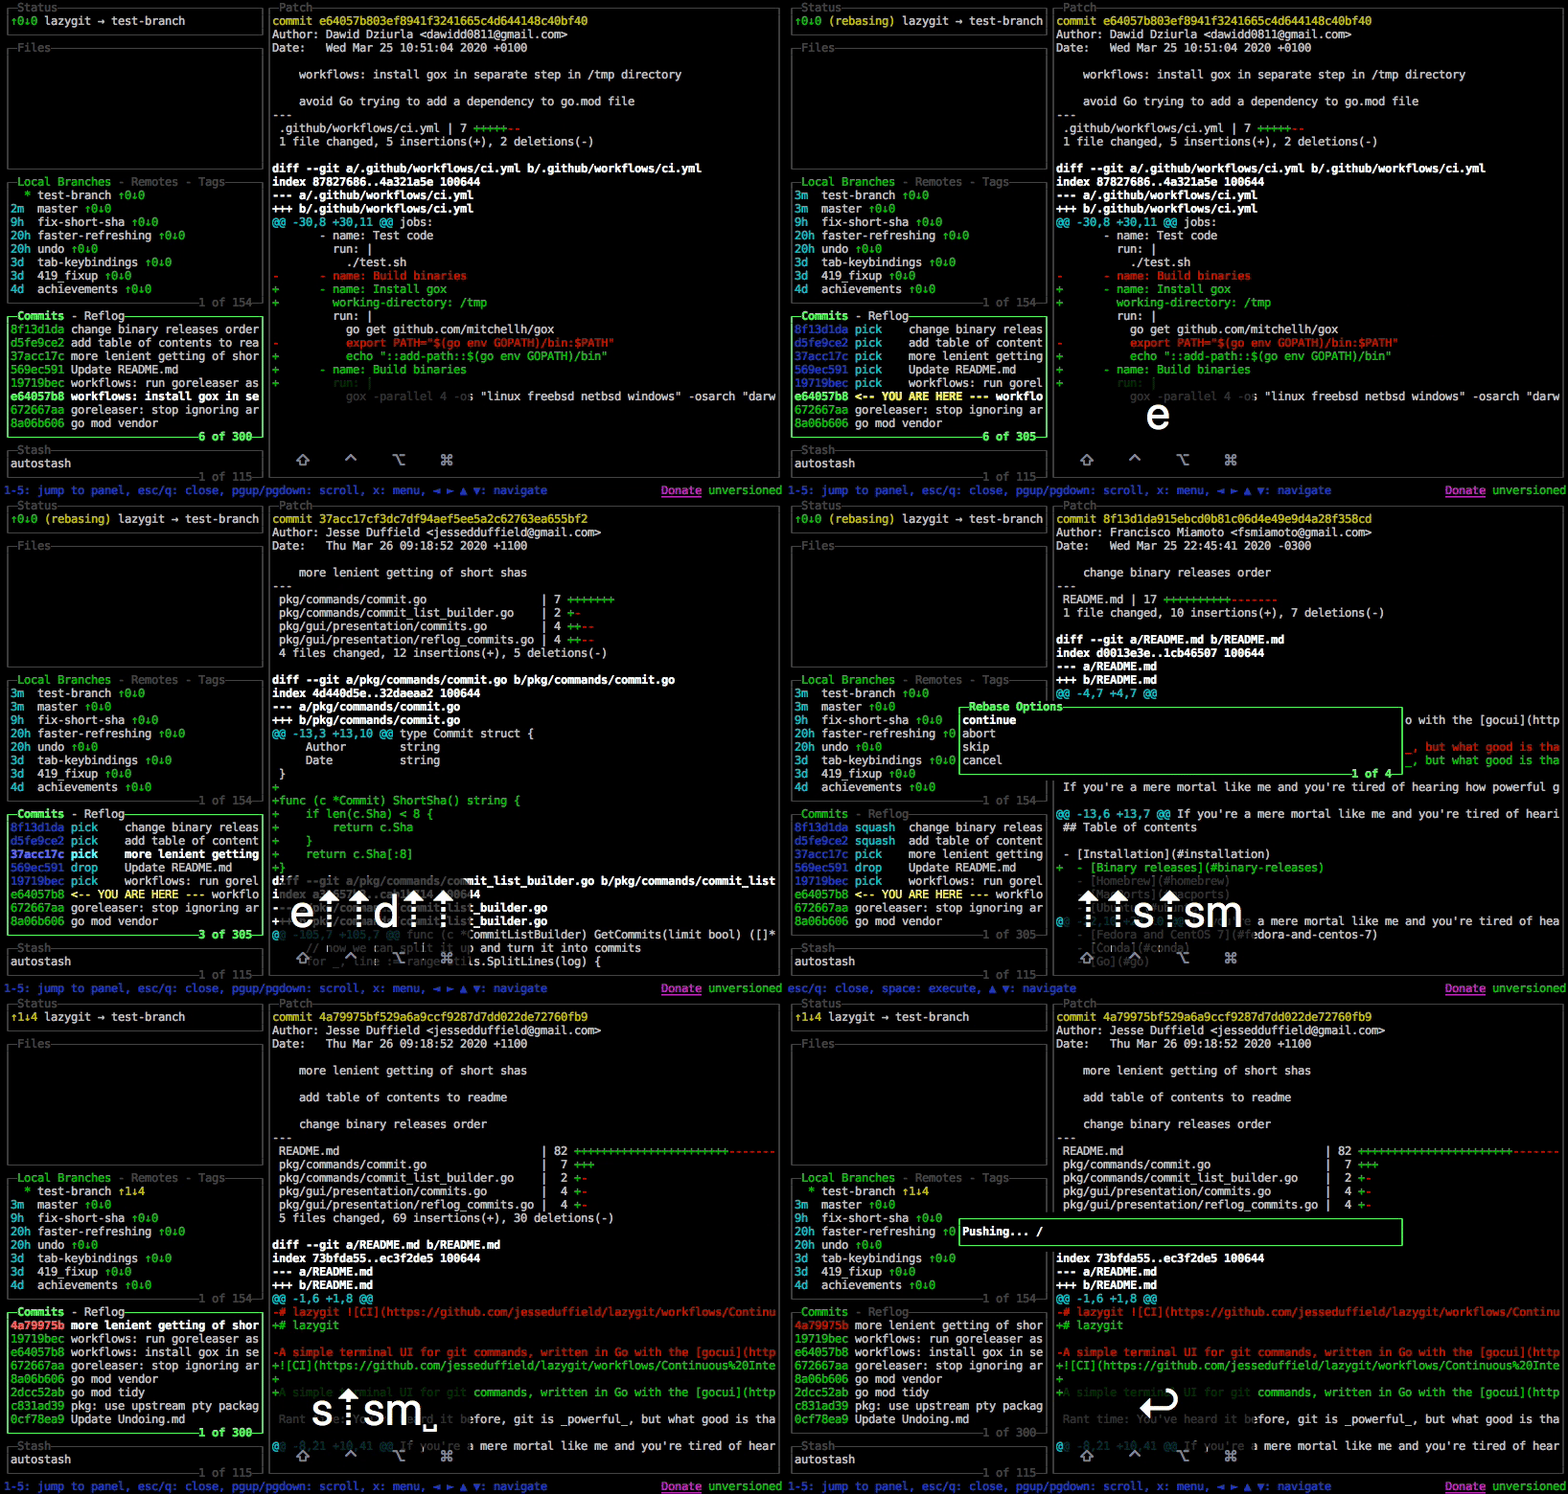
Let’s be honest: git rebase -i HEAD~5 intimidates even experienced developers. However, Lazygit turns interactive rebase into a visual, almost tactile experience. You simply highlight the commits you want to modify, press s to squash, f to fixup, or r to reword. Want to move a commit up the stack? A quick key-press does it. It’s the same powerful Git operation, but with far less cognitive overhead and far less risk of a stray typo derailing the whole rebase.
That ease is part of why interactive rebase has earned a real place in my workflow. But most days, I don’t even need it: my Git workflow is ridiculously simple about 80% of the time. A lot of my projects are solo, so unless there’s a major change to the codebase, it’s just fetch, rebase, add, commit, push. Merging is rare enough that my Git history stays unusually clean. The other 20% — multi-branch features, collaborating with others, cleaning up a messy history — is where Lazygit’s rebase UI actually earns its keep.
Painless Merge Conflict Resolution
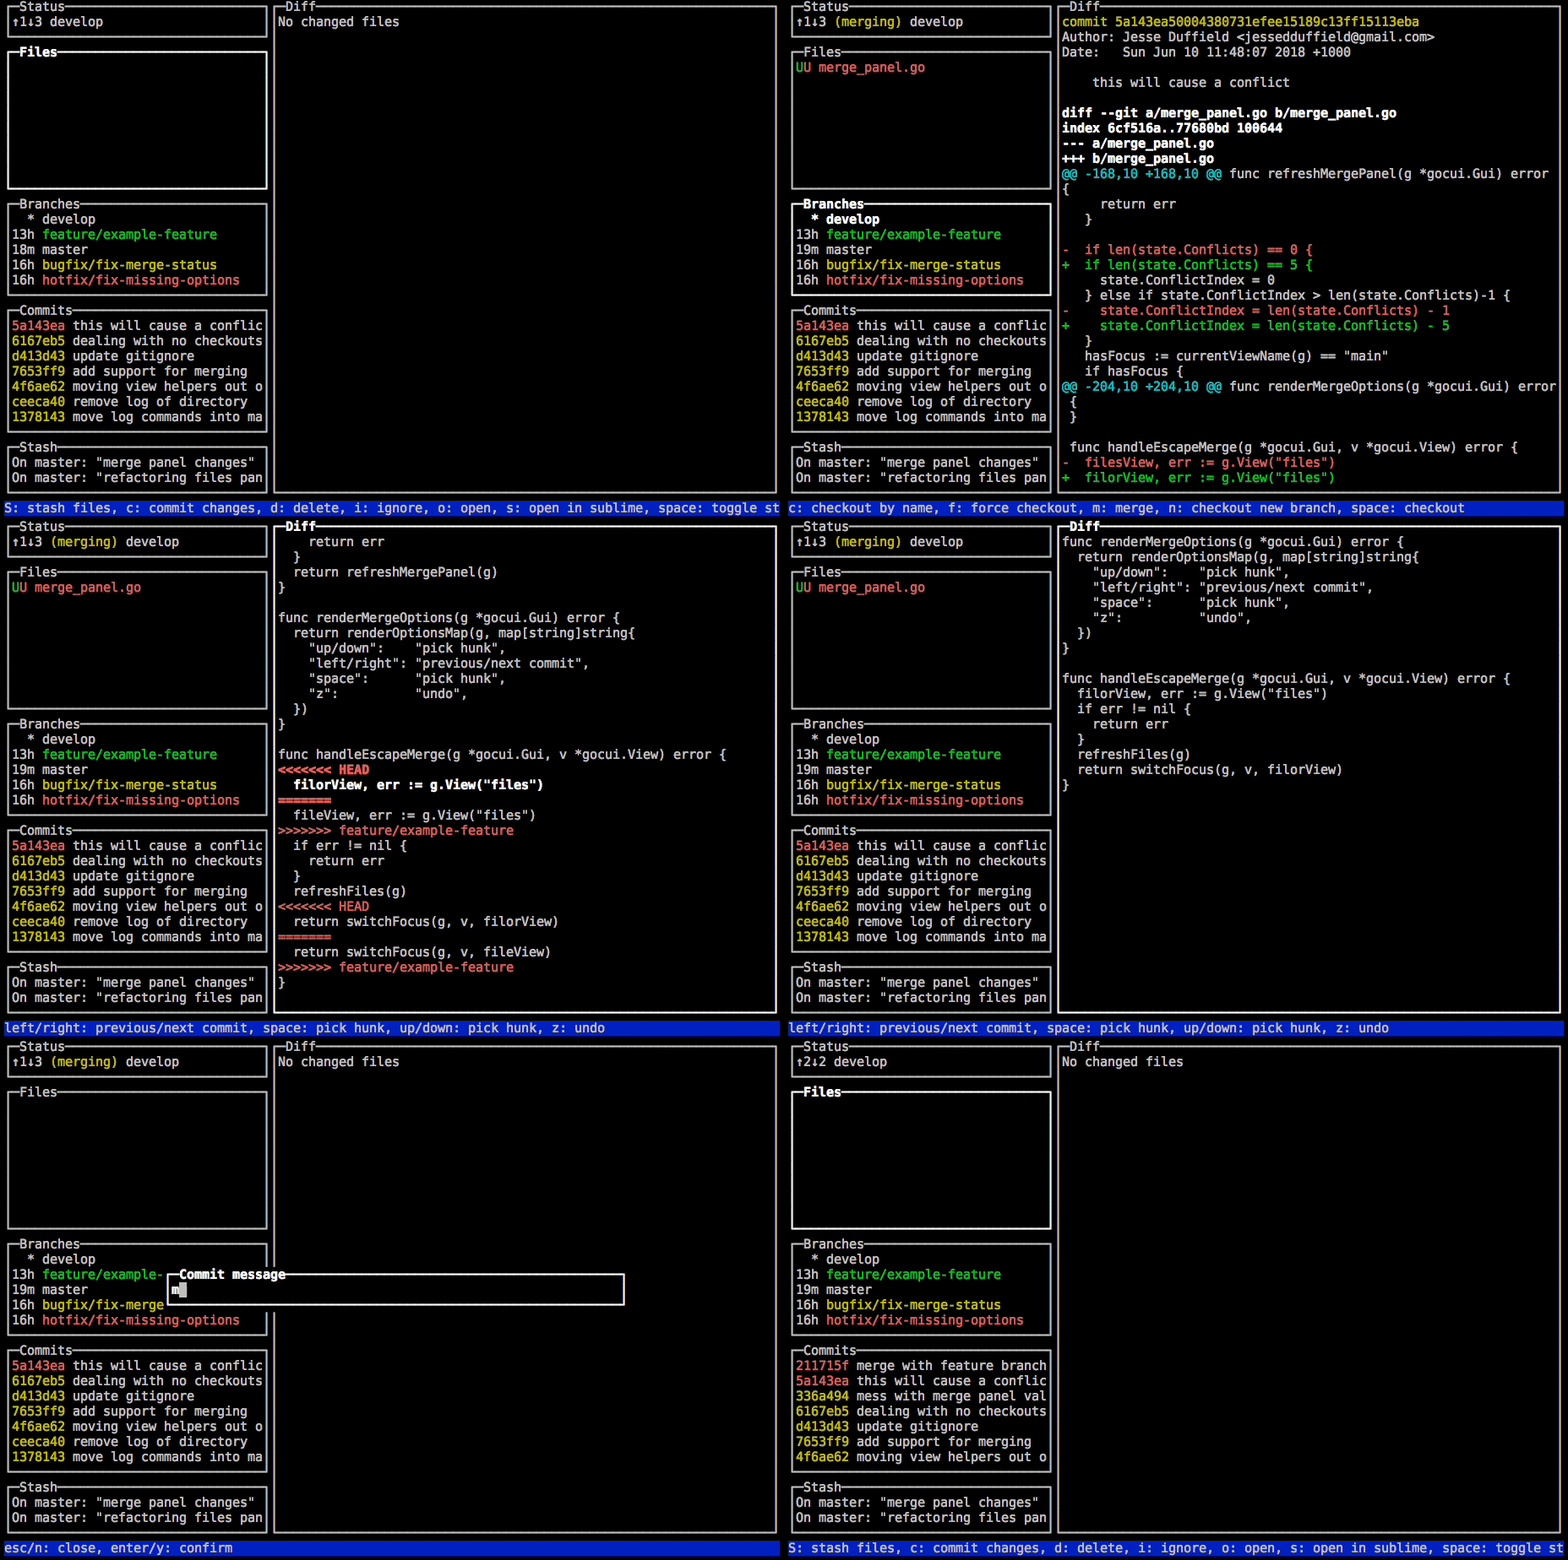
Merge conflicts are universally dreaded, usually because they involve going through <<<<<<< HEAD markers in your code editor. Lazygit intercepts this process beautifully. When a conflict occurs, it opens a dedicated, color-coded panel showing “Ours,” “Theirs,” and the combined result. You can resolve the entire file with a single keystroke or intelligently pick and choose individual hunks. It transforms a 10-minute anxiety-inducing task into a 30-second visual decision.
Undo/Redo: Reflog Made Human
When pushing boundaries, one is bound to make mistakes — generally, botching a rebase is my go-to error. Lazygit abstracts away the whole arcane dance of git reflog and cherry-picking hashes. You can undo the last action by pressing z, and redo with Z (shift+z).
The “I Just Use My IDE” Argument
I get this pushback sometimes: VS Code, JetBrains, and friends all have solid built-in Git integrations, so why add another tool to the mix?
It’s a fair question. However, most IDE Git panels are designed to be safe. This usually means burying powerful features such as interactive rebase, hunk-level staging, or reflog recovery behind nested menus, or leaving them out entirely.
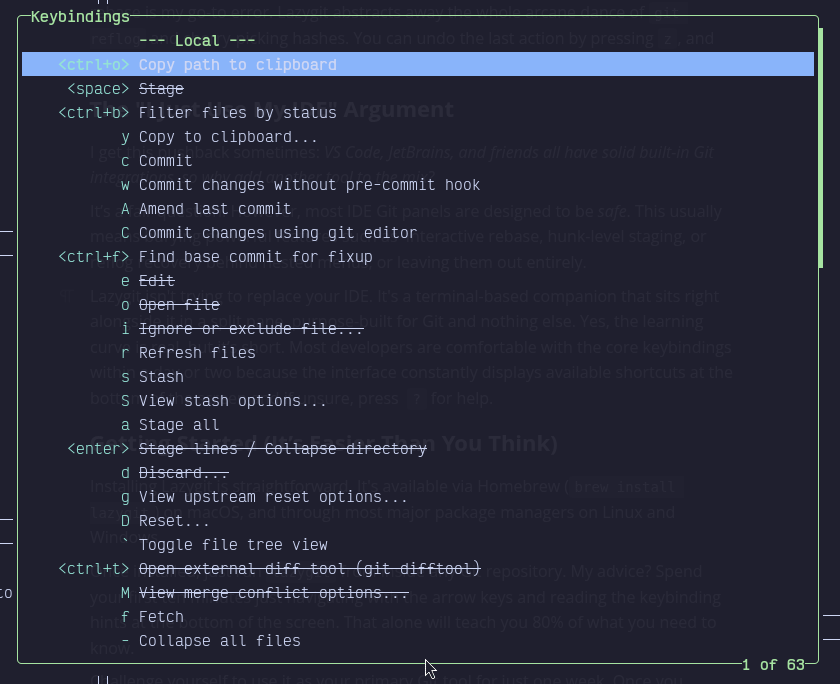
Lazygit isn’t trying to replace your IDE. It’s a terminal-based companion that sits right alongside it in a split pane, purpose-built for Git and nothing else. Yes, the learning curve is real, but it’s short. Most developers are comfortable with the core keybindings within a day or two because the interface constantly displays available shortcuts at the bottom of the screen and if unsure, press ? for help.
Getting Started
LazyGit is available through most major package managers on Linux, Windows and MacOS.
#Fedora and Redhat
sudo dnf copr enable dejan/lazygit
sudo dnf install lazygit

#Arch
sudo pacman -S lazygit

#Debian and Ubuntu
sudo apt install lazygit

#MacOs
brew install lazygit

#Windows
winget install -e --id=JesseDuffield.lazygit

#Go
go install github.com/jesseduffield/lazygit@latest
Once installed, just run lazygit from inside any Git repository. My advice? Spend your first ten minutes just navigating with the arrow keys and reading the keybinding hints at the bottom of the screen. That alone will teach you 80% of what you need to know.
Challenge yourself to use it as your primary Git tool for just one week. Once you experience the speed of keyboard-driven staging and the safety of visual rebasing, you might just find that you never want to type a raw Git command again.